I tend to be drawn to things which can give a unique quality to photos, because I’m not a fan of unadulterated realism in images—I’d rather an image was an interpretation of reality than a reproduction of it. (Though maybe I’m also drawn to these things because I’m just not very good and they help distract from that fact. Whatever.)
Infrared photography is one of those things.
(There follows some wordy bits… if you just want pictures then scroll down, there are loads.)
A brief introduction
Naturally, there’s plenty of information out there about infrared light and how to make images with it, but here’s a very quick guide.
Infrared (aka IR) light is not visible to the human eye. It’s low energy light, with a longer wavelength (and thus lower frequency) than the red end of the visible spectrum.
Unlike the human eye, however, digital camera sensors can see it. But what you think of as the sensor is not just the sensor: there are layers of optical glass that sit atop the sensor itself, serving both to protect it and to filter the light. Nearly all cameras have an IR-cut filter across their sensor, removing most IR light before it hits the receptors.
Some of these filters are stronger than others, and actually most cameras let some IR light through, so if you simply use an IR-pass filter over your lens, you’ll probably be able to make an image. The problem is that you’ll be left with only a very narrow band of wavelengths that pass weakly through, meaning that your image won’t look like full IR and—more problematically—you will need extremely long exposure times.
To solve these issues, you need a converted camera: one which has had the IR-cut filter removed from the sensor and replaced with either clear glass or an IR-pass filter.
The former gives a “full spectrum” conversion, meaning that the sensor detects both infrared and visible light: you can shoot like that, you can add an IR-pass filter to the lens to take IR photos, or you can add an IR-cut filter to the lens and you’re back to just visible light.
The latter option gives you a camera which can only shoot infrared. But it means that you can just stick any old lens on and shoot. No need for filters. You can get filters from around 950nm, which is deep infrared and will produce high-contrast images but will require bright light and/or a tripod, down to 720nm, which is still almost entirely infrared but lets enough light in to be shot handheld in nearly all conditions, and then to around 580nm, which pulls in some visible light and allows for “false colour” images. But don’t forget that you can still add filters to the lens, so you could use a 580 or 720nm camera with an 850nm filter to effectively make it an 850nm camera.
Note that unless you have a Foveon or monochrome sensor, the colour filter array stays in place because that’s integrated into the sensor itself. So infrared light only stimulates the red receptors. In a full spectrum conversion, that makes for hue shifts; in a filtered conversion it basically means you’ll be using just the red channel to create B&W images.
One last thing, though: the statement that you can use “any old lens” isn’t quite accurate. Some, such as the Fujifilm XF 27mm, produce bright infrared hotspots in the centre. Others, such as the Samyang 12mm f/2, only do so problematically at smaller apertures (at larger aperture this often becomes a gradual falloff towards the edges; essentially a similar effect to vignetting). In general, be prepared for all lenses to show more falloff and flare than they do with visible light.
There are lists on the web that give a guide as to which lenses work well for infrared or not. For example, here’s a list of Fujifilm X lenses.
The cameras
I’ve progressed through three converted cameras, which I mention here as a guide to what you can expect at the budget end of the market.
My first was a Panasonic FS7, a tiny pocket compact which had been converted to full spectrum, and which I used exclusively with a 950nm filter. The camera cost me about £50 on eBay and after having some fun with it I sold it for roughly the same. The image quality was inevitably uninspiring, but it was enough to pique my interest.


Some time after selling the Lumix I happened across a converted Fujifilm X-A5 on eBay. I was lucky enough to get it for £120 including a manual lens.
This time, image quality was obviously much better. The 24Mpx sensor is a good one, and the Bayer array is one that Lightroom handles better than the X-Trans array found in most of Fuji’s X System cameras.

However, I don’t much like the X-A series. They’re hard to carry without accidentally pressing buttons, and they lack a viewfinder. So back on eBay it went. I kept the lens and the camera still sold for £160, making the lens something of a bargain, given that I was effectively paid £40 to have it.
Next up I tried a converted X-E1 from MPB for £190. I’d hoped for a filtered conversion but it turned out to be full spectrum (MPB aren’t great at describing their cameras, and they don’t state what type of conversion it is). Unfortunately it had some marks in the sensor which couldn’t be shifted, and I believed them to be dust that had found its way under the protective glass during the conversion process. This is one of the risks of buying a conversion: if it’s been done without adequate environmental control, there may be permanent debris in images. Buy with care; preferably from somewhere with a returns policy.
It was then a few months before I came across my current IR camera: a converted X-T20, again from MPB. Described as “heavily used”, it was listed at £210, but the photos showed that it was in excellent condition. Sure enough, it arrived with just one small mark on the baseplate and was otherwise mint. To add to my luck, this time it was a 720nm conversion. Now I had a viewfinder and the ability to use whatever lens I liked. Tidy.

Most of the rest of this article is going to come with the context of shooting at 720nm, because that’s what I’ve primarily done.
White leaves, black skies—playing with tones
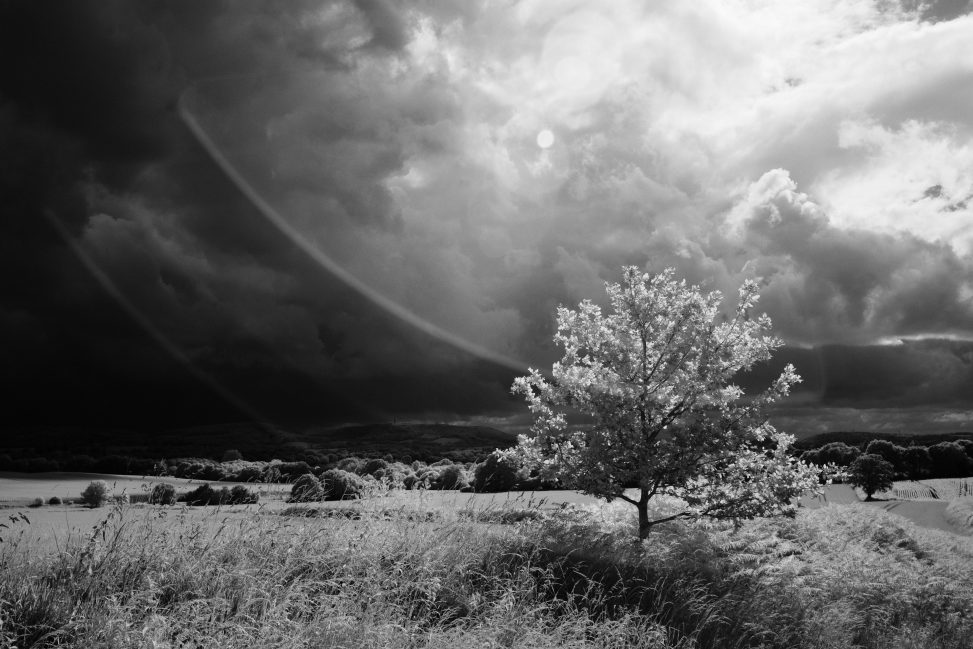
The first thing you’re going to do with any IR camera, assuming you’ve got the weather for it, is point it at some trees and or some sky. That’s where the novelty lies: if you’ve got your back to the sun, foliage turns bright white and blue sky turns black, while clouds remain white.
From there it’s a matter of constantly playing with these unconventional tones to see how they interact.
You’ll find that tones of foliage depend on where your lighting is and the angles being made. At times this can make for transitions in the frame from high key to low key—almost like a film somehow graduating from positive to negative.

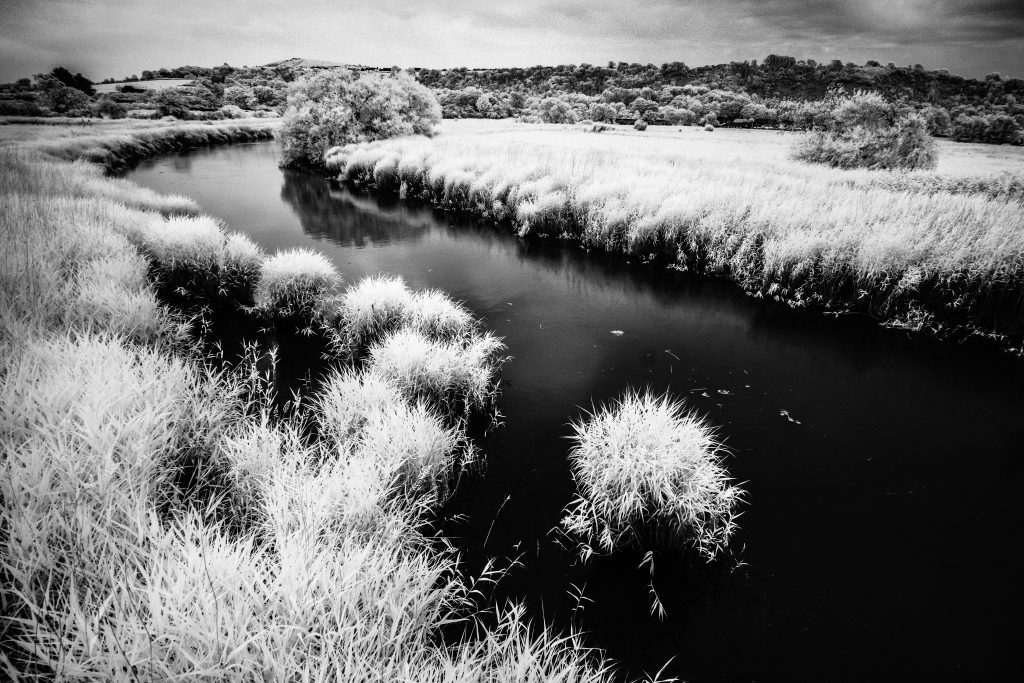
Landscapes and skyscapes
Clearly, these traits of bright foliage and dark skies come together to form the sort of images that most people bring to mind when they think of infrared photography.


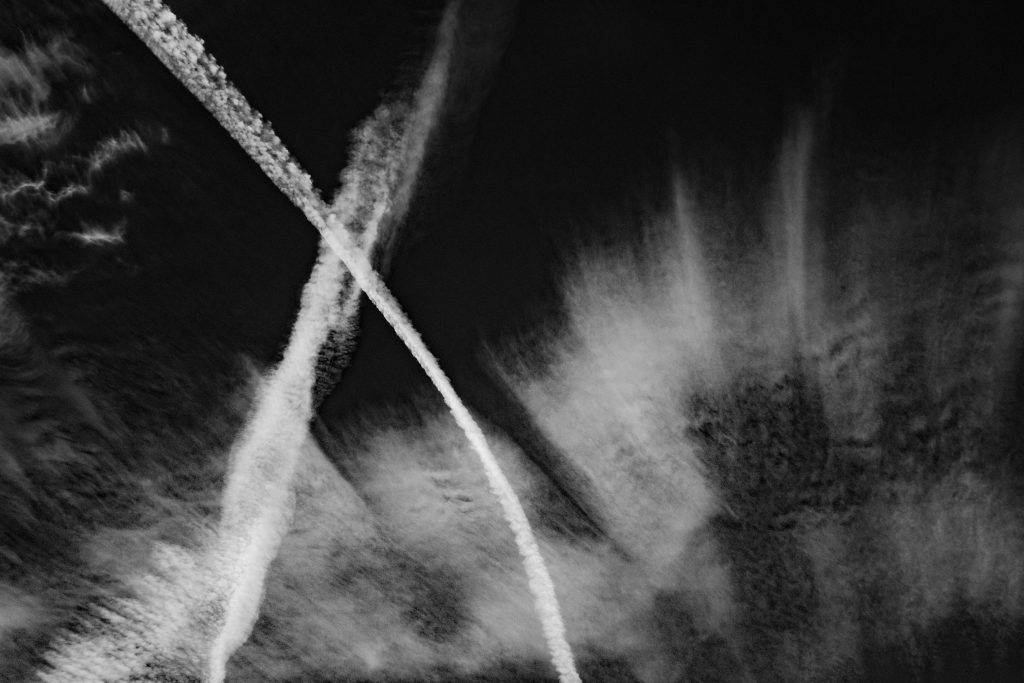
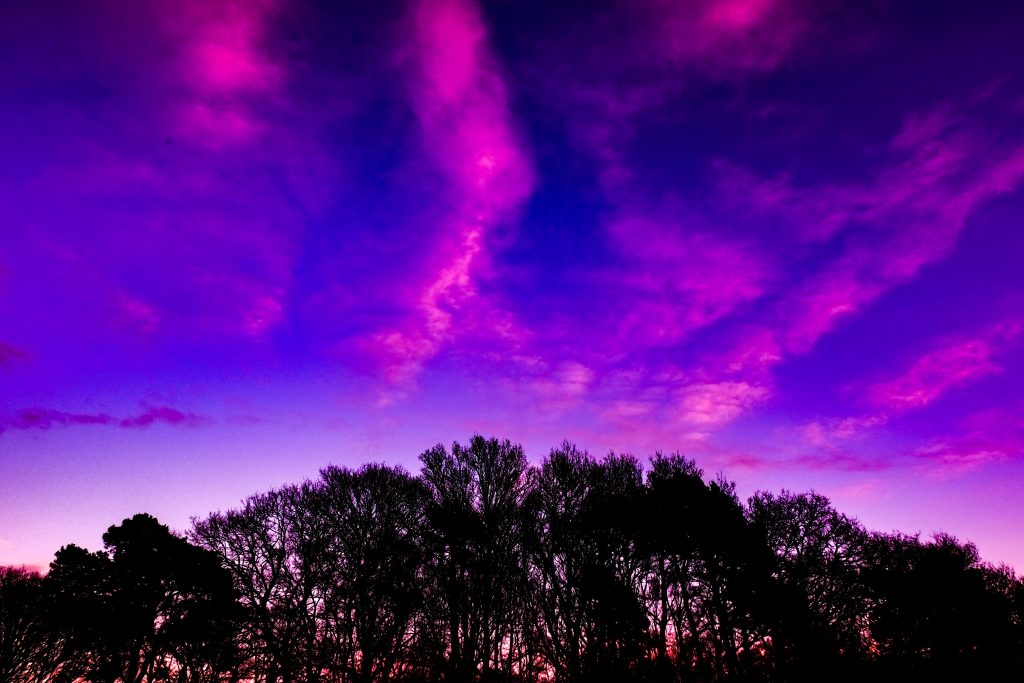
Dramatic clouds
Infrared has some ability to drag a bit more drama out of cloud textures. It’s not always a dramatic difference to what can be achieved with visible light and a firm push on the contrast slider, but it’s not quite the same.


Returning to an earlier point, the unique flaring of infrared light can produce some bold effects of its own, which of course are often a problem but can also be used to good effect.

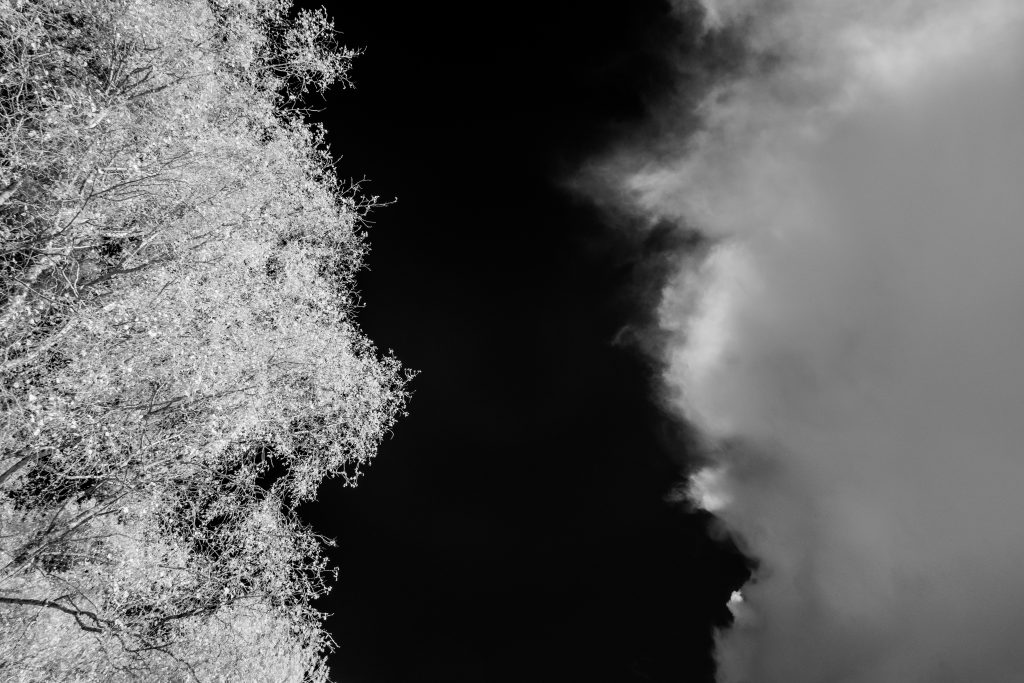
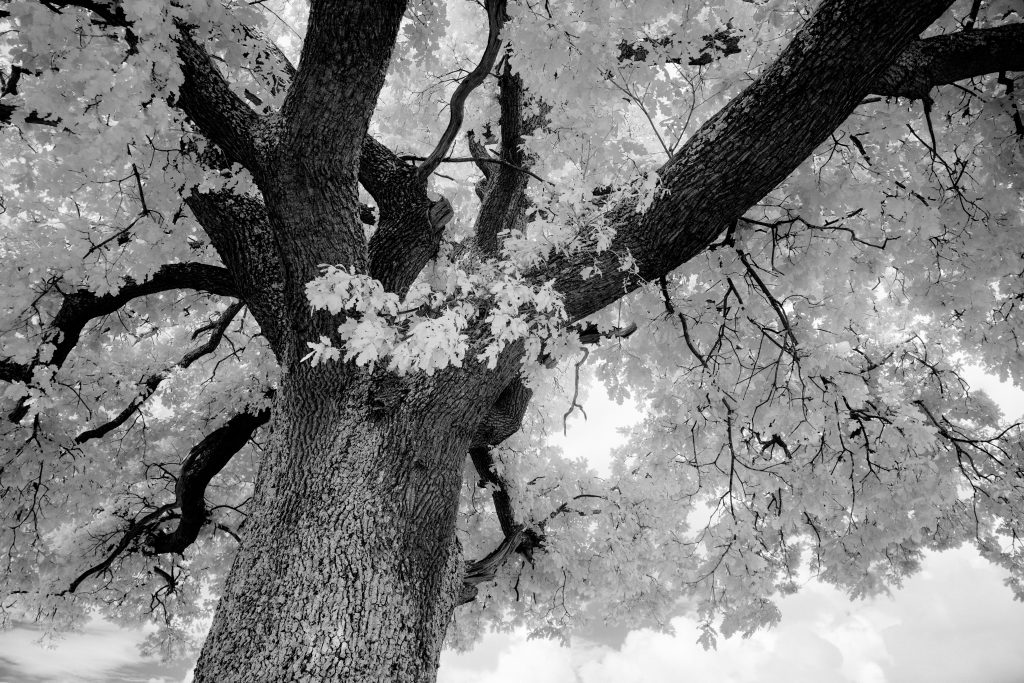
Trees and branches
Although foliage reflects and transmits a lot of IR light, bark does not. This opens up a whole genre of arboreal photography which—regardless of your opinion of its artistic merit—is irresistible. I don’t think it’s possible to walk through a sunlit wood and not point an IR camera up to the canopy, no matter how many similar images you’ve taken before. There’s a childish delight in seeing leaves shining like jewels amongst the black skeletons of branches that at times seem barely to touch the leaves.


Occasional wins
Sometimes you get lucky. Infrared light is radiated heat energy, so hot things have a particular brightness.

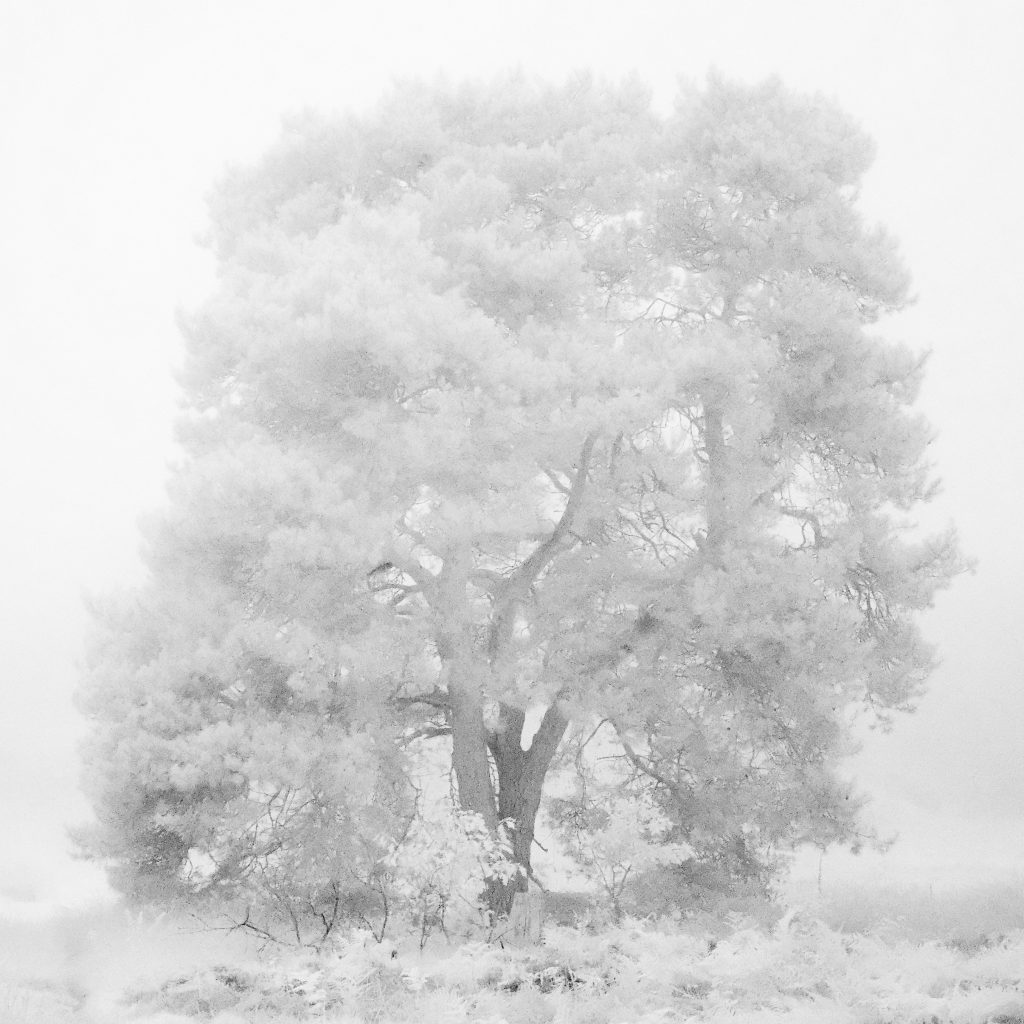
In the mist
One scenario that I hadn’t initially considered with respect to IR photography is mist. But the moment I had the opportunity to go out in thick fog with the IR camera, I found it was oddly suited to it.
The lightness of foliage helps plants to dissolve into the white atmosphere, making for an effect that can become either a wholly ethereal image, or one in which certain details can be picked out starkly.


High key abstracts
The morning of mist also led me to discover another area in which IR light gives unique images: again, that ability of foliage to dissolve into a pale background makes for a low-contrast, high-key effect that can be applied to abstracts. A long lens (here I used the XC 50-230mm) is ideal for this.


Thanks to image stabilisation and a strong breeze, you can add motion blur to those abstracts for another effect.

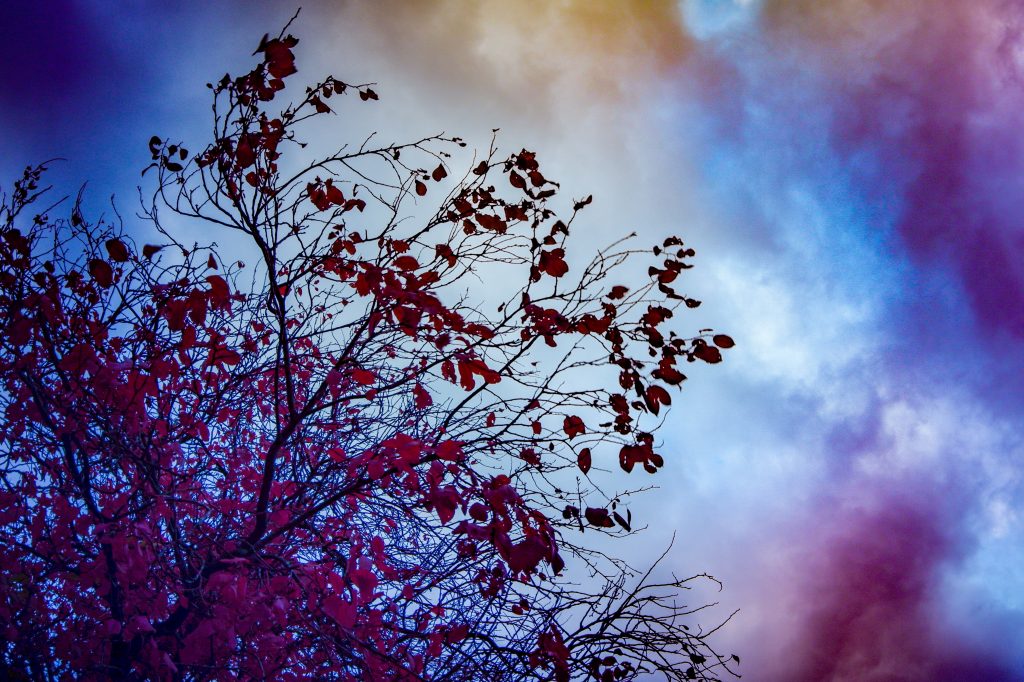
Full spectrum
If you have a full-spectrum camera, you’ll be trading the cost and hassle of lens filters for the ability to shoot whatever wavelengths you like.
Go nuts. It’s rarely going to look realistic (and why should it?) so shift those hues, turn the dials up, just have fun.

Tips for processing
Over time I’ve come to lean on a few approaches to processing B&W infrared files in Lightroom:
- If you want a contrasty landscape scene, or if you want to amplify cloud texture, the dehaze slider is your friend. Whack it up and watch the shadows blossom into rich, inky blacks.
- Expanses of bright foliage or other greenery can often end up with too little tonal variation. If you want to extract detail, it often helps to turn highlights down and whites up. The clarity slider can also help here.
- Given the amount of vignetting that lenses can produce with IR light, if you’ve used clarity or dehaze to pull detail out of skies, sometimes you need an inverted radial gradient to keep the top corners in check.
- Equally, if you have bright clouds in the sky or swathes of sunlit foliage in the foreground, a linear gradient can really help to balance the image. This is true for any image, of course, but in some scenes it can be particularly relevant to infrared light.
Go and play
Look, I’ll be honest: for most of us, an IR camera is largely a toy. But then for amateurs like me, that’s mostly what all cameras are anyway. And why not have a different kind of fun?
If I needed to start selling lots of gear I have to say the IR camera would be near the front of the queue. But if you’re canny at buying, you can get a bargain. Selling them is a challenge, so do buy with care, but maybe you’ll want to keep it forever. Who knows?
Whatever… there’s never any harm in seeing things differently.